
Create a checklist
What a checklist is, how it differs from a taxonomy, and how to build one of your own for a patch or a trip.
Updated
Bird Journal has two related ideas: taxonomies and checklists.
A taxonomy defines the species themselves — their names, and how they relate to one another. A checklist defines nothing; it points at a taxonomy and says which of those species occur somewhere. That makes checklists far easier to build and to keep current, and it means every improvement to the underlying taxonomy reaches them for free.
Bird Journal comes with checklists for most countries in the world, built on both the Birds of the World (AviList) and Birds of the World (Clements) taxonomies. They are all in the library and can be installed from any of the apps.
Do you actually need one?
Often not. If what you want is a short list of the birds you are likely to see, the Likely only filter already does that: open the checklist options while entering an entry, turn it on, and the list narrows to species you have recorded before in that area. It costs nothing to set up.
A checklist of your own earns its keep when that is not enough — you are planning a trip somewhere new and want the right species to hand before you have any records there, or you visit one patch so often that a hand-picked list of its regulars, perhaps even for one season, will genuinely speed up your recording.
Building one
You can do this on any device, and a free account is enough.
Open the Library, then the Custom tab.
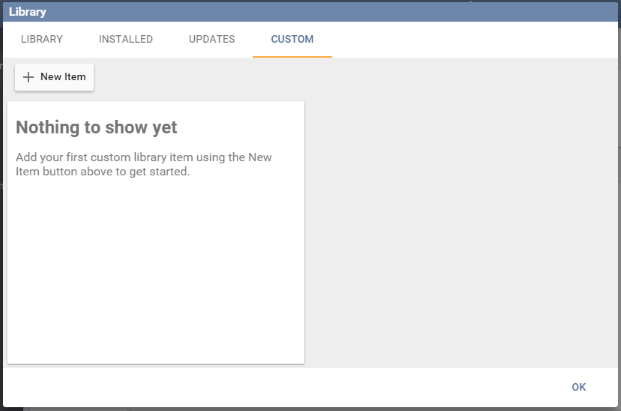
Press New Item and choose Checklist. You can start from nothing or copy an existing checklist — which is easier depends on how far your list will differ from one that already exists. If you mean to copy one, install it first so that it appears in the list to copy from.
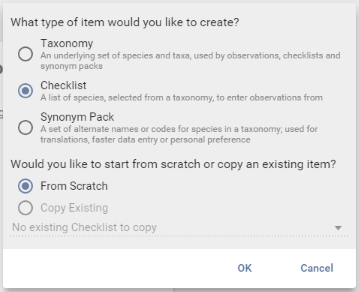
Starting from scratch shows every step, so that is what follows here. After OK the checklist editor opens.
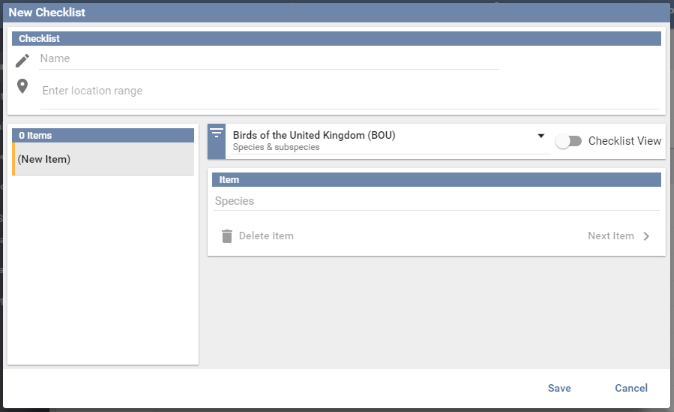
Name it. Something like Birds of the Garden or Moths of Cambridge does nicely.
Give it a location range. This is what tells Bird Journal where the checklist is relevant, so that it is offered when you make an entry there and stays out of the way everywhere else. Every library item needs one. You can add several locations if the checklist covers more than one place.
Check the taxonomy. Since a checklist points at species in a taxonomy, the right one needs to be selected before you start entering. A checklist can even draw on more than one taxonomy — just change it partway through. The same options you get when recording are available here through the checklist picker, so you can enable subspecies if you need them.
Then enter the species. Type into the Species field and pick from the suggestions. Each one you choose is added to the list on the left and the field clears, ready for the next. If you would sooner tick names off a list than type them, turn on Checklist View.
After a few species it looks like this.
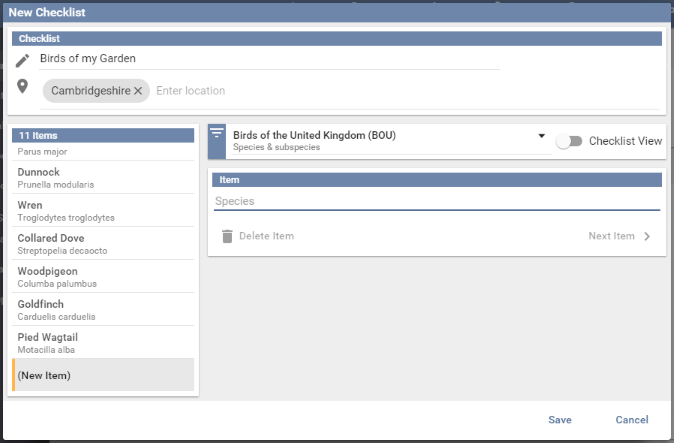
A row can be changed by entering a different species over it, or taken out with Delete. Press Save when you are happy. The checklist is then offered whenever you make an entry for a location inside the range you gave it.
Sharing it
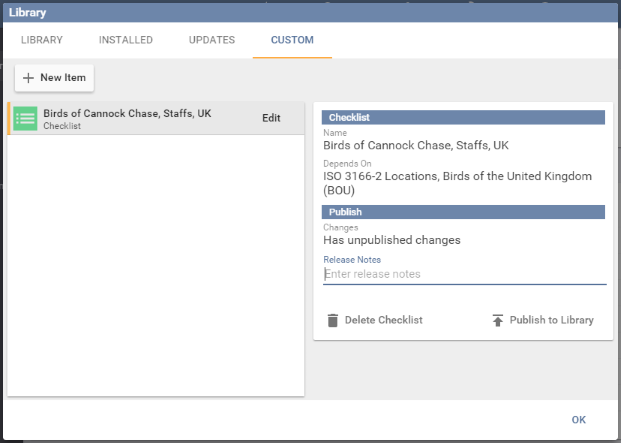
If you have made something other people would find useful, please consider sharing it. Select the checklist on the Custom tab, write a line of release notes and press Publish to Library.
There are a few things worth getting right before you do — see the library publishing guidelines.